


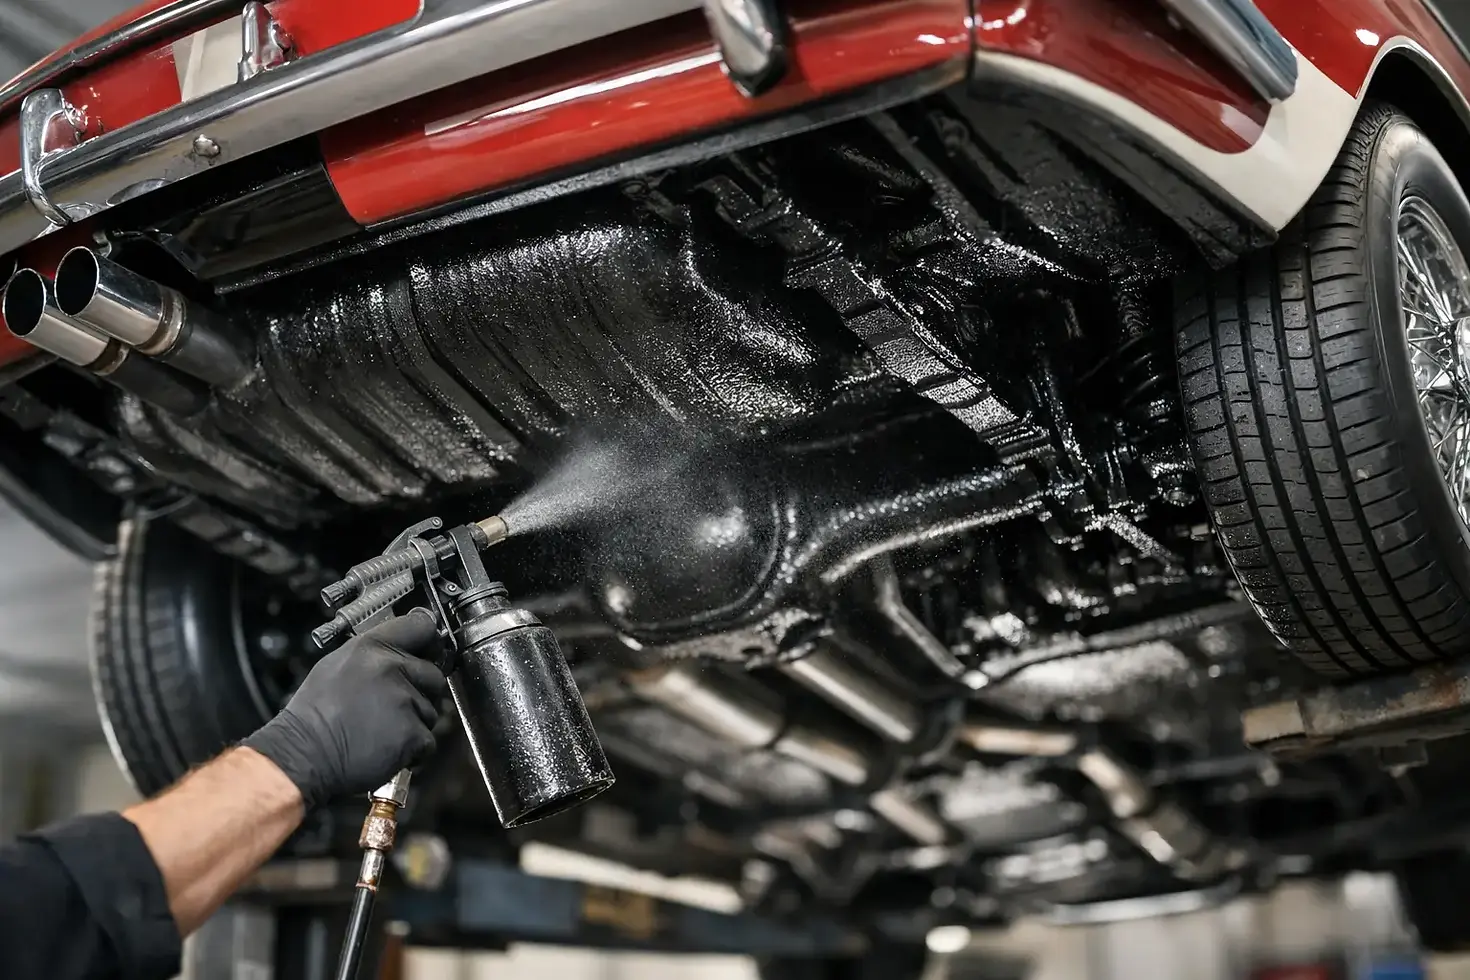
Classic Car Underbody Coating Guide That Works
A clean paint job means very little if the floor pans, frame rails, and suspension mounts are still rusting from the bottom up. Road grit holds moisture. Salt gets into seams. Old undercoating can hide weak metal until a screwdriver finds it. This classic car underbody coating guide focuses on the work that keeps a restored chassis solid instead of simply making it look black for a season.
Start With an Honest Underbody Inspection
Get the car safely on stands and give the entire underside a hard look before ordering coating materials. Use a bright work light, a scraper, and a pick or screwdriver. Check the obvious areas - floor pans, rocker seams, rear frame rails, torque boxes, wheel wells, spring perches, and body mounts - but do not stop there. Look behind brake and fuel lines, inside crossmembers, around drain holes, and at the overlap seams where factory panels meet.
Old rubberized coating is not automatically bad. If it is firmly bonded, dry underneath, and free of cracks, it may be a workable base after proper cleaning and scuffing. If it is lifting, soft, wet, or rust-stained at the edges, remove it. Coating over loose material only creates a cleaner-looking failure.
Separate the underbody into three conditions: sound coated metal, surface-rusted metal, and perforated or thin metal. Sound metal needs cleaning and abrasion. Surface rust needs mechanical removal and a compatible treatment or rust-encapsulating coating system. Holes, swollen seams, and paper-thin sections need cut-out repair and welding. No coating turns rusted-through steel back into structure.
Classic Car Underbody Coating Guide: Prep Comes First
https://www.eastwoodcanada.com/product-page/eastwood-underhood-black-paint-10024z-11oz?currency=CAD
The coating is only as good as the surface under it. This is where most shortcuts show up later as peeling, trapped corrosion, or soft undercoating around repairs.
Start by removing years of oil, gear lube, road film, and loose debris. Degrease more than once if needed. A pressure washer can help on a bare chassis, but the vehicle must dry completely before you move into coating work. Compressed air is useful for blowing moisture from seams, spot-weld flanges, brackets, and boxed sections.
Next, strip failed undercoating, loose scale, and flaking paint. A needle scaler is effective on heavy frame scale. Wire wheels, abrasive discs, and stripping wheels work well around brackets and floor contours. Media blasting is the best answer for a bare frame, separate suspension parts, and heavily pitted areas, provided you can control the media and clean it out afterward.
Do not chase every dark stain until the steel looks like a polished show panel. Your goal is stable, clean metal with no loose rust, loose coating, oil, or sharp edges that will cut through fresh material. Feather the transition between bare steel and remaining factory finish so the new system can bridge it without leaving a hard, exposed edge.
Mask with the same care you would use before paint. Keep coating off brake rotors, drums, calipers, rubber bushings, exhaust components, driveshaft slip areas, steering joints, electrical connectors, and threaded fasteners you will need later. If the car is a driver, protect the fuel and brake lines rather than burying them in a thick coating that makes future inspection difficult. https://www.eastwoodcanada.com/product-page/eastwood-canada-rust-protection-kit-rust-protection-paint?currency=CAD
Repair Metal Before You Seal It
Rust repair belongs ahead of coatings, not under them. Cut back to solid steel, fabricate the patch correctly, and weld it in without leaving unsealed overlaps. Grind welds as required by the repair, then clean both sides of the work where access allows.
Pay close attention to lap joints and replacement floor-pan seams. These areas need a quality automotive seam sealer after primer and before the final underbody coating. Apply it continuously and tool it into the seam. A thin skipped section can become a water path, especially behind a wheel or at the front of a floor pan.
Build a Coating System, Not a One-Can Fix
https://www.eastwoodcanada.com/product-page/eastwood-canada-extreme-chassis-black-satin-gallon-33991zp?currency=CAD
Different sections of the underbody need different protection. A frame sees rock impact, water, and flex. Floor pans need sealed seams and coverage in hard-to-reach recesses. Wheel wells need abrasion resistance. Bare suspension parts may need a durable chassis coating, while hidden internal cavities need a creeping wax or cavity protectant. https://www.eastwoodcanada.com/product-page/eastwood-canada-rubberized-undercoating-aerosol-18-oz-16007z?currency=CAD
For clean bare steel, use a corrosion-resistant primer suited to the topcoat you plan to apply. Epoxy primer is a strong foundation for many restoration jobs because it seals metal well and provides a stable base for seam sealer and topcoats. Follow the product's recoat window. If you miss it, scuff the surface before adding the next layer.
For tightly adhered surface rust in pits or areas where complete stripping is impractical, a rust-encapsulating coating can be a practical option. It works best on mechanically cleaned, dry, stable rust - not loose scale and not oily steel. Treat it as part of a system, not a magic liquid. If it will see sunlight, check whether it needs a UV-stable topcoat. If it will be covered by an underbody coating, confirm compatibility before spraying.
Use seam sealer where panels join. Then choose the topcoat based on service. Chassis paint is a good choice for frames, crossmembers, axle housings, and control arms. A tougher rubberized or urethane-style underbody coating can make sense in wheel wells and on floor sections exposed to stone impact. Some restorers prefer a smoother painted finish on the entire underside because it is easier to inspect and clean. That is a valid approach for a fair-weather car, but it offers less sound deadening and chip resistance than a dedicated underbody material. https://www.eastwoodcanada.com/product-page/eastwood-canada-brush-on-seam-sealer-quart-51657zp?currency=CAD
Avoid applying thick, soft undercoating directly over questionable metal. Thick coatings can hide developing corrosion, trap water at damaged edges, and make later welding miserable. Use them where they add real value - after the steel, primer, and seams are properly addressed.
Apply It Like It Has to Survive the Road
https://www.eastwoodcanada.com/product-page/eastwood-autobody-seam-sealer-cartridge-black?currency=CAD
Temperature and humidity matter. Cold steel can make coatings thicken, spray poorly, and cure slowly. High humidity can create problems on bare metal and in some coating systems. Work within the stated product range, and let each layer cure as directed before covering it.
Spray guns give the most even finish on large areas, particularly a bare frame or stripped shell. Aerosol coatings are useful for smaller repairs, corners, and touch-ups. Brush application works well on detailed brackets, boxed sections, and areas where you need to force coating into pits, but brush marks are not a problem underneath if coverage is complete.
Build coverage in controlled coats instead of one heavy pass. Heavy material can sag, skin over while staying soft underneath, and bridge gaps without actually sealing them. Focus on edges, weld seams, pinch welds, and the forward-facing surfaces that take the most road blast. Let the first coat reach the proper stage, then add the next coat according to the product instructions.
Do not forget the inside of boxed rails, rockers, doors, and other closed sections. External underbody coating cannot protect the corrosion that starts inside a cavity. Once paint and seam sealer have cured, apply a cavity wax or internal frame protectant through existing access holes or carefully planned service holes. Keep factory drains open. A sealed cavity with no drainage is a moisture trap.
Reassemble Without Ruining the Finish
Fresh coating needs time before it is exposed to jack stands, road debris, heat, or hardware torque. Reinstall components carefully, and use padded stand surfaces where possible. If bolts scrape the coating around body mounts or suspension brackets, touch those areas up before the car sees weather.
Inspect the underside after the first few drives. Look for missed edges, stone chips behind the tires, and coating damage near jacking points. A small chip repaired early is easy. Letting it sit through a wet season can restart corrosion under the surrounding film.
For Canadian cars and any vehicle driven on salted roads, rinse the underbody regularly during winter and inspect it each spring. No coating eliminates maintenance. It buys time and protects the work when you keep contaminants from sitting against it.
A properly coated underside is not just a cosmetic upgrade. It gives you a chassis you can inspect, service, and drive with confidence. Put the effort into clean metal, sealed seams, compatible products, and cavity protection, then the finish will have something solid to protect.


Comments