


Eastwood Canada Tools for Metal Repair Restoration and Shop Performance
A rusty quarter panel, a frame that has lived through too many salted winters, and a fresh set of fabricated brackets all teach the same lesson: shortcuts show up later. They show up as lifted paint, trapped moisture, weak welds, poor fitment, or a finish that looks tired before the vehicle has seen a full season.
That is why the right repair process matters as much as the part being repaired. Eastwood Canada tools and materials are built around the real sequence of automotive work: strip the surface, cut out damage, shape the metal, weld it properly, protect it, finish it, then maintain the equipment that keeps the shop moving.
For serious home builders and active shops, Eastwood is more than a paint and body name. The product range covers the full path from rough repair to finished surface, which matters when a build involves more than one task.

Start with the repair, not the brand shelf
Buying automotive supplies only by brand can leave a shelf full of products that do not work well together. A better approach starts with three questions.
What repair are you doing?
What material are you working with?
What finish standard do you need?
A driver-quality truck frame does not need the same preparation and paint process as a show-car engine bay. A race car chassis needs durable coverage and easy inspection access. A restored classic may justify extra time spent blocking, priming, sealing, and correcting colour.
That is where Eastwood’s range is useful. It includes abrasives, rust treatments, primers, chassis coatings, paint equipment, welders, metal shaping tools, powder coating equipment, and general shop tools. The practical advantage is simple: you can build a process around the job instead of forcing unrelated products to work together.
A solid workflow might look like this:
Strip coatings and corrosion from the repair area.
Cut away metal that cannot be saved.
Shape and test-fit replacement metal.
Weld with clean fitment and proper penetration.
Grind and dress the repair without thinning the panel.
Treat hidden cavities and seams.
Prime, seal, coat, or paint to match the vehicle’s purpose.
That sequence sounds basic, but it prevents most of the mistakes that ruin otherwise good work.
Rust repair needs more than a wire wheel
Canadian vehicles deal with real corrosion pressure. Road salt, freeze-thaw cycles, wet storage, and trapped debris can turn surface rust into structural damage. A wire wheel can make metal look better, but it does not always solve the problem.
Rust repair starts with an honest inspection. Surface rust, pitting, seam corrosion, and perforation all need different treatment.
Surface rust can often be stripped, treated, primed, and coated.
Pitted metal may still be usable, but it needs deeper cleaning and protection.
Seam rust usually needs access from more than one side.
Perforated metal calls for cutting and replacement, not filler.
Eastwood rust products are useful because they support several stages of the repair. Rust removers, encapsulators, internal frame coatings, seam treatments, and protective topcoats each solve different parts of the corrosion problem. The key is using them in the right order.
For example, an old truck frame may need mechanical cleaning first with abrasives or blasting. Deep seams may then need a rust treatment or coating that can reach areas a brush cannot. The exterior frame surface can receive a chassis coating once loose rust, grease, and scale are gone.
A quarter panel repair is different. Thin sheet metal needs care. Aggressive grinding can warp or weaken the panel. Rust around a wheel arch may look like a small blister but hide damage behind the lip. In that case, cutting out the affected section and welding in clean metal is usually the longer-lasting repair.
Paint does not stop poor preparation from failing. It only covers the evidence for a while.
Metal cutting and shaping decide how well the repair fits
Good metal work starts before the welder turns on. The patch panel, bracket, gusset, or replacement section must fit closely enough to weld without excessive heat or filler metal. Gaps make welding harder. Poor shaping creates stress in the repair. Rushed trimming leads to panels that need too much body filler later.
Eastwood metalworking tools help with the jobs that happen between diagnosis and welding. That can include cutting wheels, shears, nibblers, bead rollers, shrinker stretchers, hammers, dollies, panel clamps, and forming tools.
For restoration work, small fitment improvements matter. A patch with a clean flange, correct curve, and even gap welds better and finishes faster. The same applies to fabricated brackets. A bracket that is cut square, deburred, and shaped cleanly is easier to weld and less likely to crack around stress points.

When working on panels, keep a few shop habits in mind:
Make templates before cutting expensive material.
Sneak up on final fitment with small trimming passes.
Deburr every edge before test fitting.
Match the original panel shape before welding.
Use clamps to hold alignment instead of forcing the panel by hand.
A restoration shop may do these steps every day, but they matter just as much in a home garage. Careful cutting and shaping reduce the amount of correction needed later.
Welding equipment should match the material and access
Automotive welding is rarely ideal. You may be working under a car, inside a wheelhouse, along a frame rail, or near original metal with different thicknesses. The right welder and setup make the work safer and more consistent.
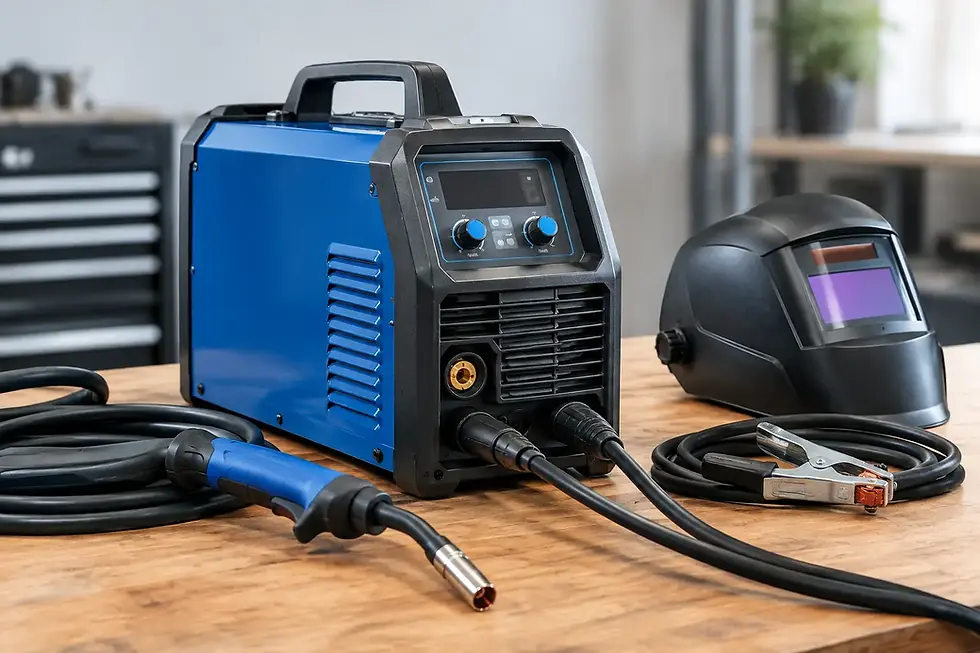
Eastwood welders and welding accessories cover common restoration and fabrication tasks, including MIG, TIG, spot weld-style repairs, plasma cutting support, welding carts, clamps, helmets, and consumables. The best choice depends on the job.
MIG welding is common for sheet metal and general fabrication because it is practical, accessible, and efficient. TIG welding gives more control for clean fabrication, thin material, and visible welds, but it asks more from the operator. Plasma cutting can speed up removal and fabrication when used with care.
The machine matters, but setup matters too. Clean metal, good ground contact, correct wire or filler, and smart heat control often decide the quality of the weld.
For sheet metal repairs, avoid long welds that build heat. Use short welds spaced apart, let the panel cool, and check alignment often. For chassis work, focus on clean joints, full access, and proper structural judgement. If a repair touches suspension pickup points, roll cage structure, or safety-critical areas, the work needs the right skill level and standards.
A good welder cannot fix a bad joint design. Take time to prepare the joint, then weld.
Coatings protect the work after the sparks stop
The repair is not finished when the weld looks good. Bare metal begins reacting with moisture quickly, especially in a shop that sees changing temperatures. Coatings protect the repair from the same conditions that caused the damage in the first place.
Eastwood Canada Products are useful here because the range covers more than topcoat. A complete coating plan may include metal prep, epoxy primer, seam sealer, chassis paint, ceramic engine paint, underhood coatings, internal frame coating, or powder coating.
Different areas need different protection.
Area | Common priority | Practical coating approach |
Frame rails | Impact resistance and corrosion control | Clean, treat, prime if needed, then apply a durable chassis coating |
Floor pans | Moisture protection and seam sealing | Protect bare metal, seal seams, then coat both sides where possible |
Engine bay | Appearance and heat resistance | Use careful prep, suitable primer, and a finish that handles heat and cleaning |
Suspension parts | Durability and serviceability | Choose coatings that resist chips and allow inspection |
Brackets and small parts | Consistent finish | Powder coating or durable paint can work well when prep is correct |
Powder coating makes sense for many small parts, brackets, pulleys, hardware, and fabricated items. It gives a clean and durable finish, but it still depends on preparation. Oil, rust, old paint, and poor grounding can affect the result.
Paint work has the same rule. The final coat reflects the surface under it. Skipping cleaning, sanding, primer, or cure time can lead to lifting, fisheyes, poor adhesion, or dull finish.

Paint and body tools help control the final result
Bodywork rewards patience. It also rewards the right tools. Sanding blocks, body files, guide coat, spray guns, mixing supplies, masking materials, and lighting all affect the finished surface.
A common mistake is treating paint as one product instead of a process. The paint system includes surface prep, filler work where needed, primer, sanding, sealer, colour, clear, and curing conditions. Each layer depends on the one under it.
For driver-quality work, the goal may be durability and a clean appearance. For show-level work, the process may involve repeated blocking, panel correction, careful masking, and controlled spray technique. Eastwood’s paint and body range supports both ends of that spectrum, as long as the process matches the expectation.
Spray equipment also needs attention. A good paint gun used with poor air supply will not perform well. Moisture in the line, unstable pressure, dirty filters, and poor cleaning habits can all create problems that look like product failure.
A practical paint setup should include:
Clean, dry air supply
Correct gun tip for the material
Proper masking materials
Mixing cups and strainers
Suitable respirator and ventilation
Good lighting across the panel
Time for test spraying and adjustment
Safety belongs in the same conversation. Welding, grinding, coatings, solvents, and paint materials all require the right protection. Gloves, eye protection, hearing protection, welding helmets, respirators, and ventilation are part of the job, not extras.
Shop performance comes from fewer interruptions
A productive shop is not only about large tools. It is about having the right equipment ready when the next step begins. Projects stall when a simple task needs a missing clamp, a worn abrasive, a contaminated air line, or a tool that cannot reach the work area.
Eastwood’s broader shop equipment range supports the less glamorous side of restoration: carts, stands, blast cabinets, lighting, compressors, pressure blasters, parts washers, and storage. These items do not always get attention in build photos, but they affect the pace and quality of the work.
For an active shop, saved time adds up. For a home builder, it keeps motivation alive. A project that can move from cutting to welding to coating without constant delays is more likely to get finished well.
Think about workflow in zones.
Dirty work area
Grinding, stripping, blasting, and cutting belong where dust and debris can be controlled.
Welding and fabrication area
This area needs clean metal storage, clamps, safe power access, and fire awareness.
Paint and coating area
This space needs cleaner air, better lighting, and careful control of contamination.
Assembly area
Finished parts need protection from grinding dust, overspray, and shop traffic.
Even a small garage can follow this logic. The zones may be temporary, but separating tasks reduces mistakes.
Matching Eastwood tools to common project goals
The best product choice depends on the build. A race car, winter-driven truck, and Sunday classic will not share the same priorities.
A race car chassis needs strength, inspection access, and coatings that do not hide cracks or damage. A street truck frame needs corrosion resistance and chip protection. A classic restoration may need more attention to factory appearance, panel smoothness, and paint depth.
Here is a simple way to plan the purchase list.
Project goal | Tools and materials to focus on | Why it matters |
Save a rusty panel | Cutting tools, welders, clamps, rust treatment, primer | The repair must remove corrosion and protect both sides |
Refinish a chassis | Abrasives, cleaners, internal coatings, chassis paint | Frames trap moisture and road debris |
Fabricate brackets | Cutting tools, drill press accessories, welders, powder coating | Fitment and finish both affect service life |
Paint an engine bay | Degreasers, sanding tools, masking, primer, spray equipment | Prep quality controls the final look |
Build a cleaner shop process | Carts, lighting, air filtration, stands, storage | Better workflow reduces rework and downtime |
This planning step prevents overbuying. It also prevents buying one impressive tool while missing the supplies that make it useful.

Build the process before opening the first can
Strong restoration work comes from sequence. Strip only what you can protect. Cut only after you understand the full damage. Weld only after the part fits. Paint only after the surface is clean, stable, and ready.
Eastwood tools and materials make sense because they support that complete path. They help a builder move from rusty metal to finished part without treating each step as a separate problem.
For Canadian projects, that matters. Vehicles face moisture, salt, storage changes, heat cycles, gravel, and hard use. A finish that looks good on day one still needs to hold up after the first season, the first wash, and the first inspection underneath.
The smartest purchase is rarely a single product. It is a repair plan built around the vehicle, the metal, and the standard you expect. Choose tools that help each step support the next, and the work will last longer than the shine.


Comments