


Preventing Rust: A Guide to Encapsulators
A frame can look solid until a wire wheel opens up the truth. Rust creeps under old paint, packs into seams, and starts working from the back side of panels long before it becomes a visible hole. Preventing rust: a guide to encapsulators starts with one hard fact: no coating can turn rotten metal into good metal. But the right encapsulator, applied over properly prepared steel, can stop sound surface rust from becoming the next repair job.
For restorations, truck frames, floor pans, suspension parts, engine bays, and fabricated brackets, rust encapsulators save time without cutting corners. They are not a substitute for blasting, welding, or proper primer work where those steps are needed. They are a purpose-built tool for stabilizing metal that is still worth saving.
What a Rust Encapsulator Actually Does
A rust encapsulator is a high-build protective coating designed to seal remaining rust and isolate it from moisture and oxygen. Rust needs both to keep spreading. When the coating forms a continuous, well-bonded film, it slows or stops that cycle on the coated surface.
That does not mean every rusty part should get coated as-is. Loose scale, failing paint, grease, salt residue, and deep corrosion create weak layers beneath the finish. The encapsulator may look good on day one, but it is only attached to material that is already coming apart. Once moisture gets behind it, the failure starts again.
Think of encapsulator as the coating stage between metal cleanup and final protection. It is especially useful when blasting reveals pitted steel that is structurally sound but cannot be returned to perfectly bright, smooth metal without removing more material than you want to lose.
Where Encapsulators Make Sense
Encapsulators work best on stable, tightly adhered surface rust and pitted steel after loose material has been removed. A truck frame with old brown staining in pits, a solid floor pan with light scale around seams, or a set of suspension arms stripped down for refinishing are all common candidates.
They are also useful on parts that are difficult to completely blast or mechanically clean, such as boxed frame sections, brackets with tight corners, crossmembers, and underbody areas with complex stampings. Accessibility changes the approach, but it does not remove the need for prep.
Use a different plan when the metal is perforated, badly thinned, swollen between layers, or rusting from an inaccessible backside. Cut out and replace compromised structural metal. On a race car, street truck, or restored classic, coating weak steel only delays a repair that should have been made properly.
Surface Preparation Decides the Result
Most encapsulator failures are preparation failures. The coating gets blamed because it peeled, bubbled, or chipped, but the actual issue is usually contamination or unstable rust left beneath it.
Start by degreasing thoroughly. Oil from an engine bay, undercoating residue, wax, silicone, and blasting dust all interfere with adhesion. Use a dedicated automotive cleaner and keep changing rags instead of spreading contaminants across the panel. Let the metal dry completely before moving ahead.
Next, remove loose rust and failed coatings. Abrasive blasting is the cleanest option for frames, suspension components, and bare shells when the part can be accessed safely. For in-place work, use a wire wheel, needle scaler, sanding discs, flap wheels, or a scraper as the job requires. The goal is not to leave every pit polished bright. The goal is to remove anything that can lift, flake, or trap moisture.
Feather the edges of sound existing paint. A sharp edge creates a weak transition where water can work underneath. If the old coating is firmly bonded and compatible with the encapsulator system, it can often remain after scuffing. Always verify the product's requirements before coating over unknown finishes.
Finally, give the surface the tooth the coating needs. Smooth, polished metal can look clean but may not provide enough mechanical grip. Abrasive blasting or a proper sanding profile gives the coating something to bite into.
Do Not Skip Seams and Overlaps
Frames, rocker panels, floor braces, pinch welds, and body seams are where rust gets established. Clean these areas aggressively, then use compressed air or vacuuming to remove dust trapped in crevices. If moisture or abrasive media remains in a seam, it can compromise the coating from behind.
After the encapsulator has cured as specified, seam sealer may be needed on body joints and floor-pan overlaps. Then apply the appropriate topcoat, underbody coating, or cavity protection for the location. A coating system works best when each layer has a job.
Choosing the Right Rust Encapsulator
Not every encapsulator is meant for the same environment. Some are formulated for brush application and heavy coverage over pitted steel. Others spray more smoothly and are better suited to engine bays, inner fenders, or visible chassis parts. The choice comes down to exposure, appearance, and the rest of your paint system.
For a frame or underbody, prioritize chemical resistance, chip resistance, and the ability to accept a durable topcoat. A brushable coating can be a practical advantage on complex brackets and weld seams because it pushes material into corners. It may not produce the finish you want on a visible firewall or suspension assembly.
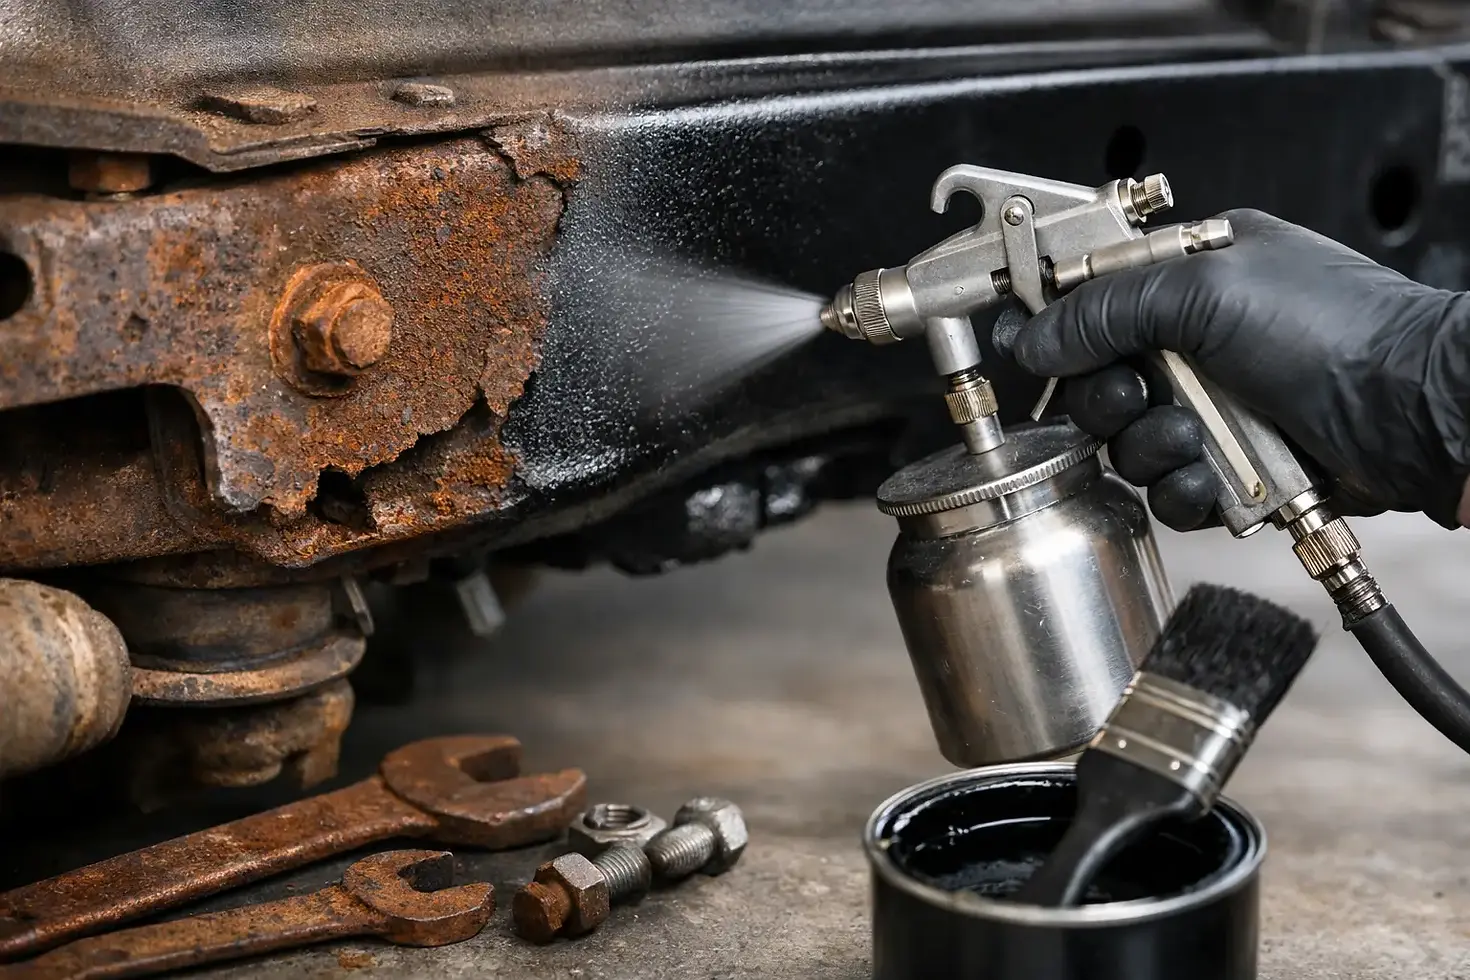
For a cleaner appearance, use a sprayable encapsulator or one that can be reduced and sprayed according to its technical instructions. Proper gun setup, film build, and flash time matter. Applying a heavy coat to make it cover faster can trap solvent and lead to a soft finish.
UV exposure matters too. Many rust encapsulators need a topcoat when used on exterior surfaces because sunlight can chalk or weaken the finish over time. A chassis black, single-stage paint, urethane topcoat, or a compatible underbody coating provides the final layer of protection and the look you want.
Eastwood and KBS Coatings both offer restoration-focused systems for rusty chassis parts, floors, tanks, and underbody components. Match the product to the part, then follow its stated recoat window and cure schedule. Mixing products without checking compatibility is an easy way to create a coating stack that fails early.
Application: Coverage Beats Thickness
Apply encapsulator in controlled, even coats. Pay close attention to welds, sharp edges, bolt holes, spring perches, brackets, and inside corners. Those spots are commonly missed, and they are usually the first places to chip once the vehicle goes back into service.
Brush application works well for awkward areas, provided the coating is worked into pits and seams rather than lightly dragged across the surface. Spray application gives a more uniform finish over larger panels, but only if the surface has been cleaned and masked correctly. Wear proper respiratory protection, gloves, and eye protection. Coatings and solvents are not shop air freshener.
Respect cure times. Parts that are handled, assembled, or exposed to road spray before the coating reaches its intended cure can be damaged before the job is even finished. Cold shop temperatures and high humidity can extend dry times, so plan the work around actual conditions rather than the clock alone.
Common Mistakes That Bring Rust Back
The fastest way to waste an encapsulator is coating over loose scale. The second is applying it over grease, old undercoating, or damp steel. Both leave a failure point under the coating where corrosion can keep moving.
Another common mistake is treating encapsulator as a final finish everywhere. A frame that sees gravel, water, salt, and temperature swings needs a complete protection strategy. Encapsulate stable rust, topcoat where required, seal joints, and protect hidden cavities. Canadian vehicles that see winter roads need even more attention to trapped moisture and salt-loaded seams.
Do not assemble hardware through fresh coating without thinking about it. Ground points, suspension mounting surfaces, threaded holes, and machined surfaces may need to stay coating-free or be cleaned after curing. Mask them before spraying whenever possible. A clean restoration job still has to fit together and function.
Build Protection Into the Whole Repair
Rust prevention is not one can of coating. It is good drainage, sealed seams, clean mounting points, protected cavities, and regular inspection after the vehicle returns to the road. If a frame has drain holes plugged with old debris, clean them. If a fender traps mud behind a liner, address the liner and the trapped material before refinishing the metal.
Do the metalwork once, prep it like the coating depends on it, and give the finished surface the protection its location demands. That is how rusty parts come back to life and stay that way long after the shop lights are off.


Comments