


How to Prep Rusty Floor Pans Properly
- ERIC GIROUX
- 2 hours ago
- 6 min read
Floor pans lie to you. What looks like light surface rust under old carpet and sound deadener can turn into pinholes, soft metal, and seam rot the second you put a wire wheel on it. If you want to prep rusty floor pans properly, the goal is not to make them look better for an hour. The goal is to find solid steel, remove what should not stay, and leave a surface ready for welding, patching, priming, or coating.
This is one of those jobs where shortcuts cost double. Trap rust under seam sealer, paint over loose scale, or weld next to contaminated metal, and you will be doing the same repair again. A good floor pan job starts with inspection and surface prep, not the coating can.
What prep rusty floor pans properly really means
Proper prep depends on what kind of rust you actually have. If the pan has only surface oxidation and the steel is still thick, you may be able to strip it, treat it, and coat it. If the metal is pitted deeply, swollen around factory seams, or punctures under a pick or screwdriver, prep becomes part of a cut-and-replace job.
That distinction matters. Rust converters and encapsulators have their place, but they are not a fix for perforated floor pans. Neither is fiberglass mat, body filler, or heavy undercoating. If you are building a car you want to keep, or a race car you expect to trust, bad metal has to go.
Start by exposing everything
https://www.gtpracing.com/?currency=CAD
Before you touch abrasives or chemicals, strip the area completely. Remove carpet, insulation, jute padding, seat mounts if needed, tar mats, seam sealer in the repair zone, and any undercoating on the underside that overlaps the affected section. Heat helps with old sound deadener, but keep fire risk in mind and work carefully around interior residue.
This is also the time to clean out dirt, oil, and rodent trash. Rust repair on contaminated metal is a waste of time. Degrease first so your abrasives cut metal instead of smearing old adhesive and grime across the panel.
A lot of floor pan rust starts from the top side, where moisture gets trapped under insulation, but the underside often tells the full story. Check braces, seat reinforcements, body mounts, and lap seams. If the top looks ugly and the bottom looks worse, plan your repair around structure, not appearance.
Know when you are saving and when you are replacing
Tap the pan with a body hammer, probe suspicious spots with a pick, and look for swelling along seams. Good steel rings differently than thin steel. If the metal flexes too easily or opens up under light pressure, do not waste time trying to preserve it.
For a driver-quality restoration, you can sometimes save factory metal with moderate pitting if it is still structurally sound. For higher-end builds or anything seeing hard use, be more aggressive. Thin steel around seat mounts, pedal areas, and braces is not where you compromise.
Remove rust, scale, and coatings the right way
https://www.gtpracing.com/product-page/eastwood-contour-sct-surface-conditioning-tool-with-4-accessory-drums
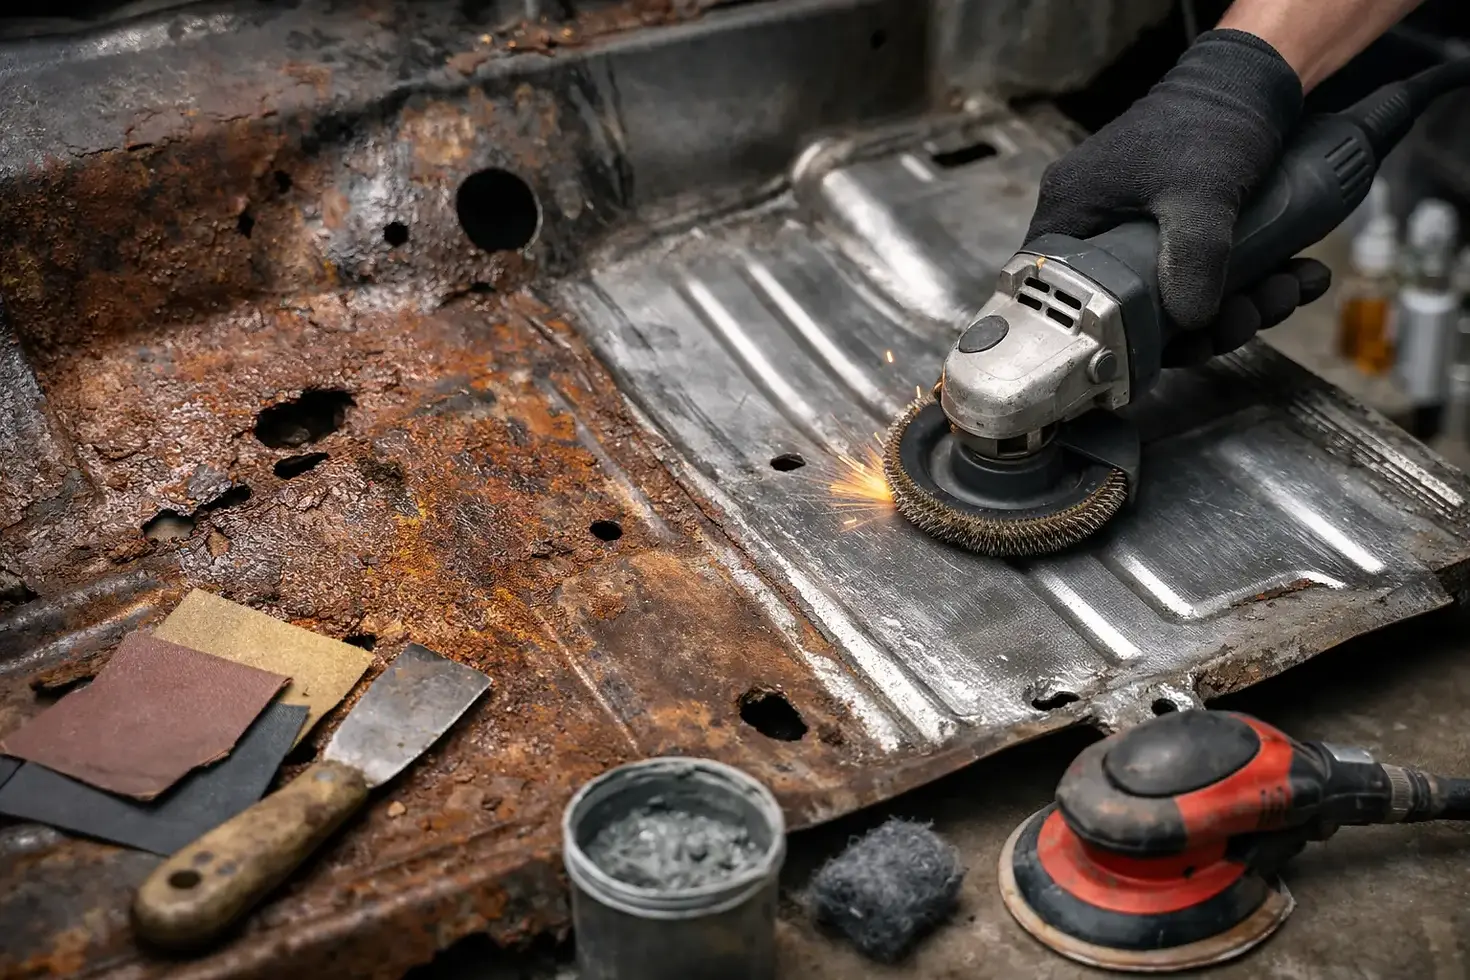
To prep rusty floor pans properly, you need clean, bare, stable metal in the repair area. That usually means mechanical removal first. A knotted wire cup on an angle grinder works for loose rust and scale. Strip discs are better when you need to remove coatings without gouging the panel. For tighter areas, a die grinder with abrasive pads, small wire wheels, or a media blaster saves time and finds hidden corrosion.
Do not lean too hard on the grinder and blue the panel. Floor pans are thin. Heat warps metal and smears contamination into the surface. Work in sections and let the tool do the cutting.
If you are prepping for welding, take the metal to bright steel beyond the repair area. That includes the flange or overlap where the new patch will land. Primer, paint, seam sealer, rust converter residue, and undercoating all contaminate welds. Clean at least an inch past where you expect to weld, and more if access allows.
Blasting versus grinding
Blasting is often the better choice around seams, spot welds, and textured rust where a grinder only polishes the high spots. It exposes pits and gets into stamped contours better than a wheel can. The trade-off is mess, equipment, and the need for control. Wrong media or too much pressure can distort thin sheet metal.
Grinding is faster for broad flat areas and easier for most home shops. The downside is that it can miss rust buried in pits and folded seams. In the real world, the best results usually come from combining both.
Treat what remains, but do not pretend
Once the area is stripped, reassess. If rust remains only in shallow pits on otherwise solid metal, a rust treatment can help stabilize what mechanical tools cannot fully reach. Use it after cleaning, not instead of cleaning.
This is where people get lazy. If the panel still has flaky scale, swollen seams, or peppered-through holes, chemical treatment is not enough. Cut it out. A treatment product is for residual rust in solid metal, not for making rotten steel seem acceptable. https://www.gtpracing.com/rust-system?currency=CAD&page=2
If you are using a rust converter or rust encapsulating system on non-welded areas, follow the product window exactly. Surface profile, dry time, and topcoat timing matter. Some products want a roughened surface. Some need topcoat within a set window. Miss that, and adhesion drops fast.
Prep for patch panels and welding
https://www.gtpracing.com/welding?currency=CAD
If replacement is needed, mark your cut lines into solid metal. Make simple shapes where possible. Straightforward patches fit better, weld cleaner, and take less finish work than trying to save every factory contour in a rotten section.
After cutting out the damage, clean the backside of the surrounding metal too. Floor pan repairs fail when the visible side is clean and the hidden side is still packed with rust and old sealer. If the pan overlaps a brace, separate and inspect both layers. Treat or replace what is compromised before the new panel goes in.
Test fit the patch with tight, consistent gaps. If you are butt welding, keep the gap small and uniform. If you are doing a flanged or lap repair, understand the trade-off. It is easier for many DIY builders, but overlaps can trap moisture if not sealed correctly. Butt welds take more time and skill but leave fewer places for rust to start again.
Use weld-through primer where it actually helps
https://www.gtpracing.com/product-page/eastwood-self-etching-weld-thru-primer-12899z?currency=CAD
On hidden mating surfaces that will be enclosed after welding, weld-through primer makes sense. On exposed weld zones, too much product can still hurt weld quality. Apply it where the metal will be trapped, not like spray paint over everything.
After welding, grind only what needs grinding. Chasing every bead perfectly flat on thin floor pans can weaken the repair. Dress the welds, inspect for pinholes, and reseal the area instead of trying to make it disappear at any cost.
Seal and coat the repair so it lasts
https://www.gtpracing.com/primer?currency=CAD
Once the metal work is finished, clean the area again. Remove grinding dust, fingerprints, and residue. Then apply the coating system that fits the job. Epoxy primer is a strong foundation over clean bare steel. On areas that still carry minor pitting but are structurally sound, a quality rust encapsulating coating may be part of the system depending on the manufacturer process.
Seam sealer belongs over properly primed seams, lap joints, and factory-style overlaps. Brushable and cartridge seam sealers both work, but coverage matters more than appearance on a floor pan. Seal every place moisture can creep back in. https://www.gtpracing.com/search?currency=CAD&q=seam
Do not ignore the underside. Topside repairs fail when the bottom is left exposed or only hit with cheap undercoating over rusty metal. Prime it, seal seams, and finish with a durable chassis or underbody coating that can handle abrasion and moisture. If the car sees wet roads, this step matters as much as the welding.
Inside the car, think beyond paint
A painted floor pan is not the final layer if you want it quiet and durable. Once coatings cure, reinstall sound deadener or insulation only over fully sealed metal. Never trap moisture with cheap padding or install interior materials over uncured coatings.
If you are restoring a street car, comfort matters. If it is a track or race build, simplicity matters more. Either way, clean, sealed, inspectable metal beats hiding the repair under thick material.
Common mistakes that ruin floor pan repairs
The worst mistake is treating rust like dirt instead of decay. You cannot clean your way out of perforation. The second is coating too soon. Rust dust in pits, solvent trapped under primer, or old seam sealer left in corners will come back.
Another common failure is only repairing the obvious hole. Rust spreads from seams, braces, and overlaps. If the surrounding metal is thinned out, the patch may be solid while everything around it continues to rot. Take the repair far enough that you are welding to steel you trust.
Finally, do not pick products based on marketing alone. Match the coating system to the substrate and the use case. Street-driven truck floors, classic car interiors, and race car shells all see different abuse. https://www.gtpracing.com/product-page/eastwood-rust-encapsulator-platinum-pint?currency=CAD
A floor pan does not need to be pretty before it needs to be right. Strip it all the way, find the truth under the scale, and build back from solid metal so the repair lasts longer than the next set of carpet.


Comments