


Automotive Rust Treatment Products for Restoration
- ERIC GIROUX
- Jul 16
- 6 min read
Rust never stays where you found it. A small bubble at a wheel opening can turn into a perforated quarter panel, and a flaky frame rail can ruin the foundation of an otherwise solid build. The right automotive rust treatment products for restoration help stop that spread, but only when they are matched to the condition of the metal and applied in the right order.
For a driver, show car, track build, or work truck, the goal is not to cover ugly metal. The goal is to remove loose corrosion, stabilize what remains, repair steel that has lost strength, and seal every surface before moisture gets another chance. Do the job right once, and the finish work, suspension parts, and drivetrain upgrades installed afterward have a solid base.
Start by Identifying What Kind of Rust You Have
Rust treatment starts with an honest inspection. Surface rust is usually orange or brown discoloration with solid metal underneath. Scale rust has lifted, layered corrosion that flakes away under a scraper, wire wheel, or needle scaler. Rust-through is different: once metal is thin, split, or perforated, no coating product can restore its strength. That section needs to be cut out and replaced with properly fitted steel.
Check more than the visible panel. Look behind wheel wells, inside rocker panels, below windshield corners, around body mounts, under battery trays, and inside frame rails. On trucks, pay close attention to leaf spring mounts, cab corners, crossmembers, and the upper side of the frame where dirt and salt collect. On unibody cars, inspect torque boxes, floor pans, subframe mounting points, and pinch welds.
A rust treatment product is not a substitute for fabrication. If a suspension pickup point or chassis section is compromised, repair the metal first. Coating weak steel only hides a safety problem.
Automotive Rust Treatment Products for Restoration: What Each One Does
A complete rust repair system normally uses more than one product. Abrasives remove corrosion. Cleaners remove contamination. Converters and encapsulators address remaining rust. Primers and topcoats provide long-term protection. Skipping one step may save time this weekend, but it can cost paint adhesion and durability later.
Mechanical Rust Removal
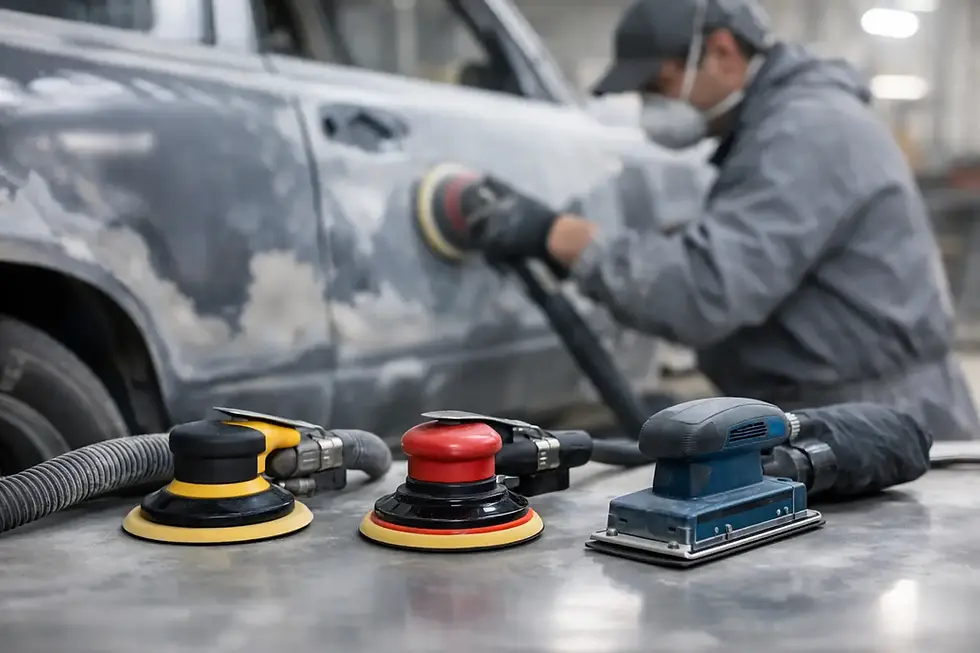
Mechanical removal is the first real line of defense. Wire wheels, stripping discs, flap discs, abrasive blasting media, needle scalers, and sanding tools all have a place. The best tool depends on the part.
A wire wheel works well in seams, brackets, and irregular cast parts, but it can polish rust instead of fully removing it if used carelessly. A stripping disc is useful on sheet metal because it removes paint and surface corrosion without aggressively thinning the panel. Flap discs are effective on heavier scale and weld cleanup, though they should be used with restraint on exterior body panels. Abrasive blasting gives the most thorough result on frames, control arms, wheels, and removable brackets, especially where rust sits in pits and corners.
The target is clean, stable metal. You do not need to grind every panel mirror-bright, but all loose scale, failing paint, and powdery corrosion must come off. If the metal is badly pitted but still structurally sound, blasting or aggressive mechanical cleaning followed by a compatible treatment system is usually the practical route.
Degreasers and Metal Cleaners
A clean surface matters as much as a clean-looking surface. Oil, silicone, road film, blasting residue, fingerprints, and old undercoating contamination can cause coating failure. Use a proper automotive degreaser or wax and grease remover before treatment, then keep bare metal clean while you work.
For parts that have been blasted, a metal cleaner or surface prep product helps remove residue and prepares the steel for the next coating. Follow the product directions for dwell time, rinsing, and drying. Bare steel can flash-rust fast in humid conditions, so plan the job before you expose the metal. Do not blast a complete body shell on Friday if it will sit unprotected until next month.
Rust Converters
Rust converters chemically react with light, tightly adhered rust and convert it into a more stable surface. They are useful in pits, seams, and areas where complete mechanical removal is difficult. They work best after loose material has already been removed.
A converter is not meant for thick scale. Applying it over flaky rust leaves a weak layer underneath, and any coating applied over that weak layer can fail. Treat converters as a finishing tool for remaining oxidation, not a shortcut around surface preparation.
They are especially useful on inner structures, brackets, pinch welds, and complex pieces that cannot be fully blasted. Let the conversion process complete, then apply the recommended primer or coating within the stated recoat window. Product compatibility matters here. Do not assume every primer sticks to every treated surface.
Rust Encapsulators
Rust encapsulator coatings are designed to seal prepared, rusty metal from oxygen and moisture. They are a strong option for frames, floor pans, suspension components, underbody areas, and other parts where a durable protective finish matters more than a paint-perfect appearance.
The word “encapsulate” does not mean “paint over anything.” The surface still needs aggressive cleaning and removal of loose rust. A quality encapsulator bonds to stable corrosion and properly prepared steel, but it cannot bond reliably to dirt, grease, loose scale, or failing factory coating.
Choose the finish based on the job. Gloss black works well for detailed frames and engine bay parts. Satin or chassis black can better match many factory-style restorations. Some encapsulators can be topcoated for added UV resistance or color matching, while others are intended as stand-alone protective coatings. Read the technical instructions before selecting a system, particularly for exterior sheet metal that will receive filler, primer, and basecoat.
Epoxy Primer and Topcoats
For bare steel bodywork, epoxy primer is often the backbone of a lasting restoration finish. It seals metal, provides corrosion resistance, and creates a stable foundation for body filler, high-build primer, seam sealer, and paint when used according to the system requirements.
Epoxy is not always the answer for every rusty underside component. A frame may be better served by an encapsulator or chassis coating system after blasting. A visible body panel generally benefits from proper metal repair followed by epoxy primer and conventional refinishing steps. The right choice depends on exposure, appearance requirements, and what products will go over the top.
Topcoats matter on areas exposed to sunlight, road abrasion, fuel, brake fluid, or heat. Use a coating rated for the environment. Engine brackets, for example, face heat and chemical exposure. Wheel wells and frames need chip resistance. Exterior panels need a complete paint system with compatible primers and clearcoat.
Do Not Ignore Seams, Cavities, and the Back Side of Repairs
Most restorations fail from the hidden side first. You can repair a floor pan beautifully from inside the cabin, but if the underside, weld seams, and overlapping edges are left bare, moisture will work back into the repair.
After welding, remove weld scale and spatter, clean the panel, and coat both sides wherever access allows. Seam sealer should be applied over the correct primer or coating layer, not directly over dirty metal. Once sealed, protect the underside with an appropriate chassis, underbody, or chip-resistant coating.
For enclosed areas such as rockers, doors, quarter panels, frame rails, and crossmembers, cavity wax is one of the most worthwhile steps in the entire job. It creeps into seams and overlaps that a spray gun cannot reach. Apply it after paint and coatings have cured, using a wand to reach the internal structure. Reinspect high-exposure areas periodically, especially on vehicles that see wet roads.
A Practical Product Sequence for Common Restoration Jobs
For a removable frame or suspension part, degrease it, mechanically remove corrosion or blast it, clean the surface, address remaining rust in pits if needed, then apply a chassis-grade encapsulator or primer-and-topcoat system. Let cure time drive the schedule. Handling parts too early leaves marks and weakens the finish.
For a body panel with surface rust, strip paint beyond the affected area, remove rust to clean steel, repair any thin or perforated metal, clean thoroughly, and apply epoxy primer. From there, perform filler and primer work using a compatible paint system. If the panel rust came from the backside, treat that source before reinstalling the part.
For an underbody or floor pan, remove loose undercoating and scale, inspect for holes and weak seams, weld repairs as needed, clean and treat stable remaining rust, then use a coating built for abrasion and moisture. Follow with seam sealer and underside protection where the system calls for it. Do not trap moisture under rubberized material or thick undercoating.
Eastwood and KBS Coatings systems are built around these kinds of restoration jobs, from rust prep through frame and chassis protection. Select products by substrate and exposure, not by whichever can looks toughest on the shelf.
Common Mistakes That Bring Rust Back
The most common failure is coating over loose scale. The second is poor cleaning. The third is treating only the visible face of a panel while ignoring the seam, cavity, or underside that caused the corrosion in the first place.
Another mistake is mixing products without checking compatibility. Acid-based treatments, self-etch products, epoxy primers, seam sealers, and topcoats all have specific application windows and surface requirements. Use one proven system whenever possible, and test an unfamiliar combination on a scrap panel before committing it to a finished vehicle.
Temperature and humidity also matter. Cold steel, condensation, and high humidity can compromise adhesion or cause flash rust. Keep the work area dry, allow the metal to reach product temperature, and use proper personal protection when grinding, blasting, spraying, or working with chemical treatments.
Rust repair is not glamorous, but it decides how long the rest of the build survives. Clean the metal thoroughly, repair what is weak, coat every exposed side, and give hidden cavities the same attention as the parts everyone sees.


Comments