


Guide protection dessous de caisse
- ERIC GIROUX
- Jul 9
- 6 min read
One bad season of gravel, rain, and heat cycles can wreck the underside of a solid build. A proper guide protection dessous de caisse is not about making the bottom of the car look pretty. It is about stopping stone chips, holding back rust, and protecting metal you do not want to cut out later.
If you are working on a restoration, a street truck, or a car that sees hard miles, underbody protection is one of those jobs that pays off only if you do it right the first time. The coating matters, but prep matters more. And if the vehicle already has scale, oil contamination, or old failing undercoating, no miracle product is going to save a lazy surface.
What a guide protection dessous de caisse should actually cover
Most people think underbody protection is one product. It is not. You are dealing with several separate problems at once - impact from road debris, corrosion from water and salt, abrasion, heat exposure near the exhaust, and noise control if that matters to the build.
That is why the right system depends on the vehicle. A restored classic that stays mostly dry does not need the same underside treatment as a year-round truck. A race car also changes the conversation. Some race builds need protection, but they also need serviceability. Thick rubberized coatings can hide damage, trap contamination if applied over bad metal, and make inspections harder.
The job starts with one question: are you preserving clean metal, sealing repaired metal, or trying to slow down existing corrosion after cleanup? Those are three different starting points, and the coating stack should match them.
Start with inspection, not product
Before you buy anything, get the car in the air and inspect the entire underside under bright light. Look at floor pans, frame rails, pinch welds, torque boxes, suspension pickup points, wheel wells, trunk drop-offs, and any seams where spot-welded panels meet. If the vehicle has factory seam sealer that is cracked or lifting, deal with that first. If there is old tar-style undercoating flaking off, remove it. Coating over failed material just locks in the problem.
You also need to identify contamination. Gear oil mist, engine oil seepage, brake fluid residue, and road grime all kill adhesion. A lot of coating failures get blamed on the product when the real issue was poor cleaning.
If you find rot, soft metal, or blistering rust that goes deeper than surface scale, stop thinking about coatings and start thinking about repair. Protection products are not metal replacement.
Surface prep decides how long it lasts
This is the part people try to rush. It is also the part that separates a coating that lasts years from one that peels in sheets.
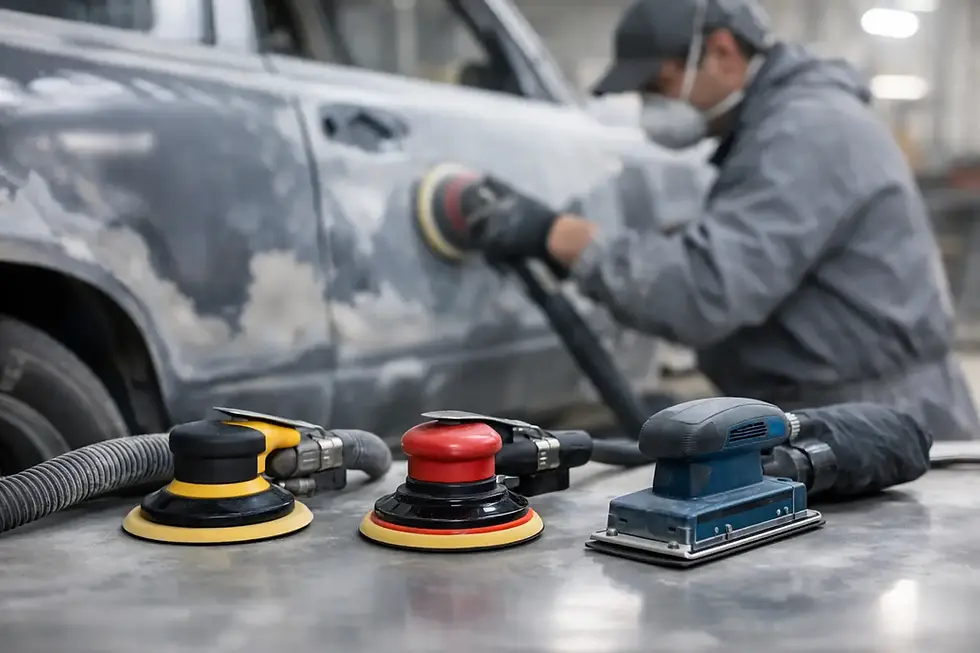
Remove loose scale mechanically. Depending on the area and condition, that might mean a wire wheel, abrasive disc, needle scaler, scraper, or blasting. For a proper restoration or chassis refinish, blasting is usually the cleanest path because it gets into pits and seams better than hand tools. On a driver, you may combine scraping, wire brushing, and spot blasting.
After mechanical removal, clean the surface with a proper degreaser. Then use a prep step that promotes adhesion and addresses any remaining microscopic contamination. Bare steel, repaired patches, and blasted parts all benefit from a system approach instead of random layers from different shelves.
If you are coating boxed sections, inside frame rails, or hidden cavities, use products made to creep into seams and overlap joints. Flat exterior coatings do not replace cavity protection.
Choosing the right underbody protection system
There is no single best answer. There is a best answer for your use case.
Paintable chassis coatings
For restorations, frame work, and performance builds where you want a durable finish that can be cleaned and inspected easily, a paintable chassis coating system makes a lot of sense. These products usually start with properly prepped steel, then build with primer or rust-control chemistry, followed by a durable top layer designed for impact resistance and chemical exposure.
The advantage is control. You can see what the metal is doing over time. Touch-ups are straightforward. It also looks cleaner on a detailed build. The trade-off is that a painted underside does not deaden sound like a heavy rubberized coating, and it still needs real chip resistance in high-impact zones.
Rubberized or flexible undercoatings
These work well when the goal is chip resistance and some noise reduction, especially in wheel housings and driver-grade underbodies. Flexibility helps absorb impact from gravel and debris. That said, quality and prep are everything. A flexible coating over damp rust or oily residue will fail, and once it starts lifting, moisture can move underneath.
Use these where flexibility is useful, not as a blanket fix for rotten metal. Avoid putting thick undercoating over areas you need to inspect often, especially on performance cars and race builds.
Rust preventive coatings for repaired or pitted metal
If the underside has been cleaned back but still shows pitting from prior corrosion, a rust preventive system can help seal the surface before topcoating. This is common on older trucks, unibody restorations, and floor pan repairs. The key is staying within a compatible system so the base layer and top layer bond correctly.
Seam sealer and cavity protection
This gets missed all the time. Water enters through seams, overlaps, and internal cavities. If you repaired floors, patched trunk areas, or worked around wheel tubs, seal the seams correctly before final coating. Then protect enclosed sections separately. A pretty underside is worthless if moisture is working inside the structure.
Where each product belongs
The underside is not one surface. Floor pans, frame rails, wheel wells, suspension areas, and inner cavities all see different abuse.
Wheel wells take the most direct stone impact, so they usually benefit from a tougher, more chip-resistant coating. Frame rails and floor pans often do well with a paintable chassis system, especially if you want a cleaner finish and easier inspection. Around exhaust routing, make sure the product can handle the temperature. Near fuel and brake lines, keep the coating controlled and clean - do not bury service parts in thick material.
On race or track-focused cars, less is often more. You want protection, but you also want to spot cracks, witness marks, and damage quickly. In that case, a durable painted system is usually smarter than a heavy textured undercoat.
Common mistakes that ruin the job
The first mistake is coating over loose rust. The second is skipping degreasing. The third is mixing products that were never meant to work together.
Another bad move is applying heavy coats too fast. Thick material can skin over and trap solvent underneath, which leads to soft spots or adhesion loss later. Follow cure times. Let each stage do its job.
Masking also matters more than people think. Brake rotors, exhaust, sensors, driveshafts, and threaded hardware should not be fogged with underbody material. Do the job right and keep service points serviceable.
Finally, do not ignore drainage. If a panel or rail has drain paths, do not block them with sealer or coating.
How to match protection to the vehicle
A fair-weather classic usually needs a clean, inspectable finish with good corrosion resistance and solid seam sealing. A daily-driven truck needs more chip protection and more attention to wheel wells, lower floor sections, and inside cavities. An off-road rig needs abrasion resistance and frequent inspection because mud and trapped debris change everything. A race car needs coatings that protect without hiding problems.
That is why a guide protection dessous de caisse should never promise one universal method. The best system depends on climate, use, storage, and how far you are taking the restoration.
If you are buying for a project in stages, start with prep tools, degreasers, rust treatment products, seam sealer, and a coating family designed to work together. That keeps guesswork down and saves rework later. Shops and serious DIY builders usually get better results when they build the underside like any other critical system - prep, base, seal, topcoat, and maintenance.
Maintenance still matters after coating
Even a good underbody coating is not permanent. Wash the underside after winter driving or gravel-road use. Inspect chip-prone areas at least once a season. Touch up damage before it spreads. If you see lifting at an edge, address it early instead of waiting for a larger failure.
This is especially true on builds that see rain, salt, or regular track loading. Heat, vibration, and debris are hard on coatings. A ten-minute inspection on the lift can save a lot of metal.
For builders sourcing restoration and performance supplies in one place, GTPRACING’s approach makes sense because the underside of the car is not separate from the rest of the project. Rust repair, prep, coatings, fabrication, and chassis work all connect.
The underside is easy to ignore because nobody sees it at a car show. But the people who build cars right know better. Protect it like it matters, because it does.


Comments