


How to Prep Bare Metal for Paint the Right Way
- ERIC GIROUX
- Jul 20
- 6 min read
Bare steel starts rusting the moment it is exposed to moisture, fingerprints, and shop air. That is why knowing how to prep bare metal for paint is not just about making a panel look clean. It is about building a coating system that stays bonded through heat cycles, road spray, vibration, fuel vapor, and years of real use.
A good paint job cannot rescue poor substrate prep. If the metal is contaminated, polished too smooth, carrying blast residue, or left bare too long, the failure may not show up until months later. Do the job right at the metal stage, and everything that follows - filler, primer, seam sealer, color, and clear - has a fighting chance.
Start With Honest Bare Metal
Before selecting abrasives or primer, make sure the panel is actually clean bare metal. Rust scale, old paint in pits, body filler trapped along a repair edge, and oily residue around a chassis weld all count as contamination. They need to come out.
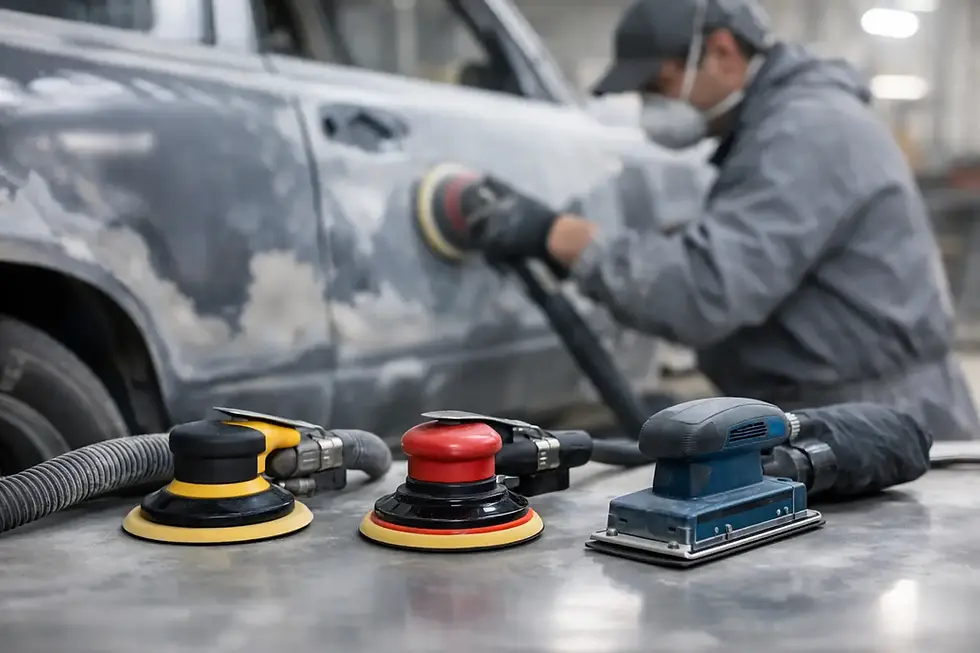
For a solid panel with light surface rust, a dual-action sander, wire wheel, stripping disc, or media blasting can get you down to clean steel. The right method depends on the part. A large flat hood or door skin needs a controlled touch to avoid heat warping. A frame, bracket, wheel tub, or heavily pitted suspension component can take more aggressive blasting.
Do not treat a shiny surface as proof that rust is gone. Rust often remains in pits, seams, pinch welds, and behind overlapped panels. If brown staining remains at the bottom of a pit after sanding, keep cleaning or use a compatible metal treatment according to its directions. Painting over rust residue is a shortcut that will come back through the finish.
Match the Abrasive to the Job
For most automotive sheet metal, 80-grit sanding scratches provide a dependable mechanical profile for epoxy primer. That scratch pattern gives the primer something to bite into without gouging the panel unnecessarily. Use a sanding block where possible so you do not create low spots or wavy body lines.
Media blasting is excellent for complex shapes, rusty brackets, engine bay corners, frames, and parts with layers of old coating. But it has trade-offs. Excessive pressure, the wrong media, or holding the nozzle in one area can distort thin sheet metal. After blasting, blow every seam, flange, and cavity clean. Blast media hiding in a rocker seam or crossmember can work loose later and ruin fresh paint.
Avoid taking the metal to a polished finish. Fine sanding and polishing can reduce primer adhesion. You are not trying to make steel pretty. You are creating clean, dry metal with a consistent profile.
Clean It Before and After Sanding
https://www.eastwoodcanada.com/product-page/eastwood-canada-pre-painting-prep-10594zp?currency=CAD
Sanding without cleaning first can grind silicone, wax, grease, and skin oils into the metal. This is a common reason for fish-eyes, adhesion problems, and primer that looks good initially but lifts around repair areas.
Start with a quality wax and grease remover made for automotive refinishing. Apply it with one clean lint-free towel, then wipe it dry immediately with a second clean towel. The first towel lifts contamination. The second removes it before the solvent flashes off and leaves the contamination behind.
Then sand or blast the panel. Once the metal is profiled, blow it off with clean, dry air and repeat the solvent-cleaning process. Keep your bare hands off the panel after that. Wear clean nitrile gloves when moving it, especially around door edges, hood lips, and fabricated brackets where fingerprints are easy to miss.
Compressed air deserves attention too. A dirty compressor can send water and oil directly onto freshly prepared steel. Use proper filtration and drain the tank. If the air line spits moisture, stop and fix that problem before spraying anything.
Treat Flash Rust and Weld Areas Carefully
Freshly stripped metal can develop flash rust fast, especially when humidity is high or the shop temperature swings overnight. A panel may look clean when you leave it and show an orange haze by morning. That light rust still needs to be removed before primer. Scuff it clean, wipe it down, and re-establish the surface profile as needed.
Welded repairs need extra work. Grind welds only as far as the repair allows. On visible exterior panels, the goal is a controlled, level repair without thinning the surrounding steel. On a frame or structural bracket, prioritize weld integrity and access for coating rather than chasing a cosmetic finish.
Clean weld smoke, grinding dust, and anti-spatter products off thoroughly. Many fabrication chemicals are not paint-ready. If you used weld-through primer inside an overlap, follow the coating manufacturer's recommendation for what can be applied over the exposed area. Do not assume all primers, metal conditioners, seam sealers, and weld-through coatings work together.
Metal Conditioner Is Not a Universal Step
https://www.eastwoodcanada.com/product-page/eastwood-pre-green-painting-prep-gallon?currency=CAD
Phosphoric-acid metal treatments can help remove light oxidation and condition steel, particularly in pits and difficult areas. But they are not automatic prep for every paint system. Some epoxy primers can be applied over a properly treated surface, while other systems require the treatment to be rinsed, neutralized, or completely removed first.
Read the technical data sheet for the exact primer and treatment you are using. Mixing products based on forum advice is not a coating system. If the manufacturer calls for clean, sanded metal with no conversion coating underneath, follow that instruction.
Prime Bare Metal on the Right Schedule
For most restoration and performance work, a quality two-component epoxy primer is the right first coating over properly prepared bare steel. It provides corrosion resistance and a stable foundation for later steps. It is a strong choice for body panels, engine bays, chassis parts, fabricated brackets, and interior floor repairs when used within its intended application range.
Spray epoxy as soon as practical after final prep. Same day is best. If a panel has to sit, keep it in a dry, clean area and inspect it again before priming. Bare metal stored near a wet floor, open garage door, or active grinding area is being contaminated whether you can see it or not.
Etching primers have their place, but do not stack them under epoxy just because it sounds like extra protection. Many modern epoxy systems are designed to go directly over properly sanded or blasted metal. Some manufacturers specifically prohibit applying epoxy over self-etching primer. Follow one compatible system from bare metal forward.
Apply the epoxy at the recommended film build, flash time, reducer ratio, and temperature range. Too thin and you lose protection. Too heavy and you can trap solvent or create cure problems. Product instructions are not optional fine print - they are part of the repair.
Plan Filler, Sealer, and Topcoat Before You Spray
https://www.eastwoodcanada.com/primer?currency=CAD
The best prep sequence depends on the repair. For a simple clean panel, you may epoxy prime, allow the required cure, block sand, apply high-build primer if needed, then move toward sealer and paint. For a welded patch or pitted restoration panel, the repair may need epoxy, filler work, more primer, and repeated blocking before color.
Body filler over bare steel is common in collision and restoration work, but epoxy-first workflows are also used when the product system allows filler over cured epoxy within a specified window. There is no one answer that fits every product line. What matters is maintaining proper adhesion windows and sanding the surface when that window has passed.
Seam sealer generally belongs over epoxy primer, not directly on questionable bare metal. It seals joints, flanges, and lap seams, but it cannot make an unprepared seam rust-proof. Coat hidden backsides, seams, and boxed areas before final assembly whenever access allows. This is where projects either last or start rusting from the inside out.
For chassis and underbody work, use a coating system built for abrasion, moisture, and chemical exposure. For exterior panels, use paint products intended for refinishing and block the panel straight before color. A frame does not need show-car blocking. A black hood will expose every ripple. Prep should match the part's job and the finish you expect.
A Quick Pre-Paint Check
https://www.eastwoodcanada.com/product-page/eastwood-canada-after-blast-metal-prep-cleaner-11971zp-products?currency=CAD
Before the first coat of epoxy, verify that the panel is free of visible rust, dust, media, oil, and fingerprints. Confirm the surface has an even sanding or blast profile, the air supply is dry, and your primer is within its usable temperature range. Have your mixing cups, strainers, clean towels, respirator, and spray equipment ready so bare metal is not sitting around while you scramble for supplies.
GTPRACING carries restoration-grade abrasives, metal prep, epoxy primers, spray equipment, and coatings for the work that happens before the color coat. Choose a compatible system, read the data sheets, and give the metal the attention it will never get once the panel is assembled. Paint is only as durable as the steel preparation underneath it.


Comments