


How to Prep Metal for Powder Coating
- ERIC GIROUX
- 2 days ago
- 6 min read
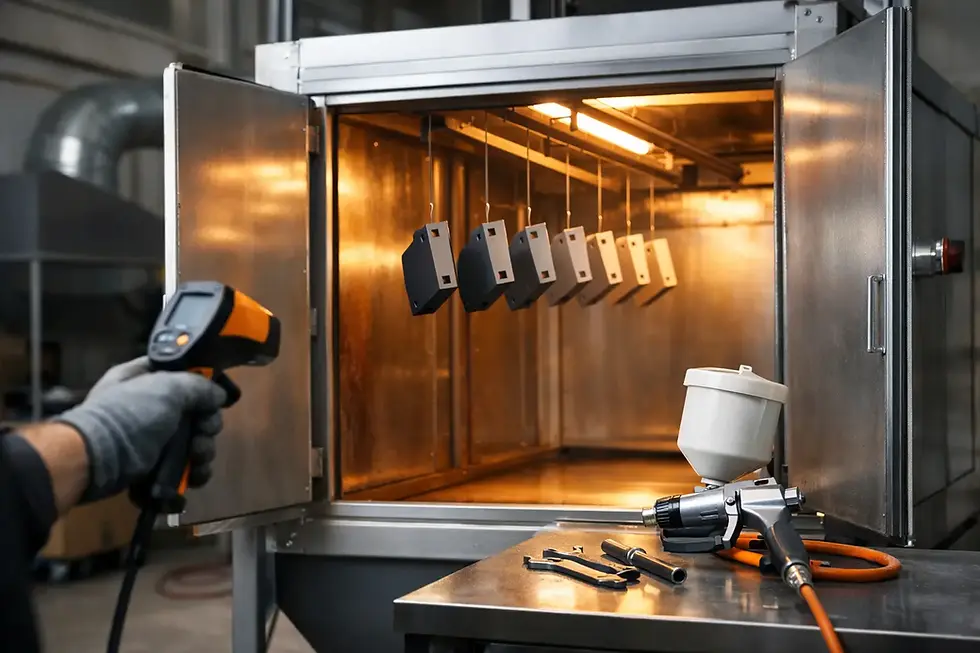
A powder coat job usually fails before the powder ever hits the part. Fish eyes, peeling, pinholes, and poor coverage almost always trace back to bad prep, not bad powder. If you're figuring out how to prep metal for powder coating, the real job is getting the surface clean, stable, and consistent enough for the coating to bond and cure without surprises.
That matters even more on automotive parts. Brackets, valve covers, suspension pieces, wheels, crossmembers, and fabricated steel all bring their own problems - oil soaked pores, rust scale, old paint, silicone contamination, weld slag, or trapped gases in castings. Do the prep right and the coating lays down clean and lasts. Cut corners and you'll be recoating the same part again.
How to prep metal for powder coating without shortcuts
The basic sequence is simple: remove grease and contaminants, strip the old finish, create a mechanical profile, deal with outgassing if needed, and keep the part clean until it goes in for coating. The exact method depends on what the part is made of and what it has been exposed to.
Fresh fabricated steel is different from a 40-year-old suspension arm. Aluminum is different from cast iron. A part that lived underhood needs more degreasing than a decorative bracket that sat on a shelf. The goal stays the same - clean bare metal with an even surface profile and no residue.
Start by looking at the part like a problem solver. If it has caked grease, blasting first just drives contamination deeper. If it has heavy rust scale, a quick solvent wipe won't fix anything. If it's a porous casting, trapped oils and gases can come back during cure and crater the finish. Prep has to match the condition of the metal.
Start with degreasing and contamination removal
Before you strip coatings or blast, get rid of oil, wax, road grime, cutting fluids, and silicone. This is where a lot of home jobs go wrong. Guys see rust and old paint, so they go straight to abrasive blasting. Then the blast media pounds contamination into the surface and makes it harder to clean later.
Use a proper degreaser, not just whatever solvent is nearby. Solvent can smear grease around if the buildup is heavy. Water-based degreasers, wax and grease removers, and dedicated pre-paint cleaners all have their place, but the key is using enough cleaner and enough clean wipes so you are lifting contamination off the part instead of redistributing it.
Pay close attention to seams, spot weld flanges, threaded holes, and tubing ends. Automotive parts hold junk in places you can't see. If you're working on suspension parts or chassis pieces, expect years of road film and undercoating residue. If it's an engine bay part, expect oil vapor and old chemical residue. Clean until the rag stops coming back dirty.
Strip rust, paint, and scale back to solid metal
Powder coating needs a sound substrate. That means rust, old paint, flaky mill scale, and failing finishes have to go. If the old coating is lifting anywhere, remove it all. Coating over a weak layer just guarantees the new finish will fail with it.
Abrasive blasting is usually the best route for automotive metal because it removes corrosion and creates the anchor profile powder likes. The media matters. Aluminum oxide, garnet, crushed glass, and similar abrasives can work well depending on the metal and the condition of the part. Softer media may be fine for lighter cleaning, but if the part has scale or stubborn corrosion, you need enough bite to get to clean metal.
For thin sheet metal or delicate aluminum parts, blasting pressure and media choice matter more than brute force. Too aggressive and you can warp edges or erode detail. For heavier steel brackets, frames, and fabricated parts, a stronger blast profile is usually an advantage. You're looking for clean, uniform metal, not random shiny spots mixed with rust shadows.
Chemical stripping can help on parts with multiple paint layers or awkward shapes, but it has to be done carefully. Any stripper residue left in seams, pores, or crevices can cause problems during cure. If you use chemical removal, follow it with a thorough rinse or neutralization process as required, then dry the part completely and still plan on mechanical abrasion before coating.
Create the right surface profile
Clean metal is not enough by itself. Powder coating also needs tooth. That is the fine surface texture that gives the coating something to grip.
Blasting is usually the easiest way to create that profile consistently. If blasting is not an option, sanding or mechanical abrasion can work on some parts, but it is slower and less uniform. On simple flat parts, sanding can be acceptable. On textured castings, brackets with corners, or anything with welds and recesses, blasting does a better job.
Don't polish the part smooth before powder coating unless the coating system specifically calls for it. A slick surface can reduce mechanical adhesion. For most steel and aluminum parts, a clean, evenly abraded finish is what you want.
Watch for outgassing on cast and previously contaminated parts
This is where many otherwise clean jobs get ruined. Cast aluminum, cast iron, and old oil-soaked parts can release trapped gases when they hit cure temperature. That gas pushes through the powder and leaves pinholes or bubbles in the finish.
If the part is porous or has lived around oil for years, pre-bake it before coating. Heat the bare part enough to drive out oils and trapped volatiles, then let it cool and clean it again. Sometimes one bake is enough. Sometimes an old casting needs more than one cycle before it settles down.
This is especially common on intake pieces, valve covers, transmission housings, differential covers, and older cast brackets. Freshly blasted metal can still outgas if the contamination is below the surface. A pre-bake costs time, but less time than stripping a failed finish.
Final cleaning matters more than most people think
Once the part is stripped and profiled, you're in the danger zone for recontamination. Bare metal picks up fingerprints, moisture, dust, and shop junk fast. If you handle it with dirty gloves or leave it sitting near silicone sprays, grinding dust, or oily air tools, you've already started sabotaging the coating.
Blow the part off with clean, dry compressed air. Make sure your air system is not spitting oil or water. Wipe only if your cleaning process calls for it and use lint-free materials. After final prep, handle the part with clean gloves and hang or store it where it stays clean and dry.
This is also the time to deal with masking points, threaded holes, grounding contact areas, and drain paths. If powder pools inside a threaded bore or bridges a sealing surface, you're making extra work for assembly later. Good prep includes planning for the part to go back on the vehicle without rework.
Metal type changes the prep process
Steel is usually the most forgiving. Degrease it well, remove rust and mill scale completely, and blast it to a uniform profile. If flash rust starts after cleaning, move quickly or control humidity because powder should not be applied over active oxidation.
Aluminum takes more attention. Oxide forms quickly, and cast aluminum often carries contamination deep in the pores. Clean thoroughly, strip any failing coating, use the right blast media, and expect to pre-bake many cast pieces. Thin aluminum parts also need a lighter hand during blasting to avoid damage.
Stainless steel can be powder coated, but the surface still has to be abraded properly. Its corrosion resistance does not replace mechanical prep. If the stainless part has fabrication discoloration, weld scale, or polishing residue, remove it before coating.
Galvanized metal can be tricky. The zinc layer can create adhesion and outgassing issues depending on condition and cure schedule. It often needs special prep and more caution than plain steel. If you're coating galvanized parts, test your process instead of assuming your normal routine will be enough.
The common mistakes that ruin adhesion
The biggest mistake is thinking the powder will hide bad prep. It won't. Powder is a finish, not a repair material.
The second mistake is mixing contamination sources in the shop. If your prep area shares space with silicone products, oily grinding residue, or dirty compressed air, you can ruin a clean part in minutes. The third is rushing parts straight from blasting to coating without checking for embedded grease, trapped media, moisture, or outgassing risk.
Another common problem is only cleaning what you can see. Hidden cavities, spot weld seams, tubing interiors, and cast pockets often cause the defects that show up after cure. Automotive parts are full of those traps.
If you want the coating to last, prep like the finish depends on it
Because it does. Powder coating is tough, but only when it bonds to properly prepared metal. Clean first, strip to sound material, build the right profile, pre-bake porous parts when needed, and keep the surface clean right up to coating. That is how you get a finish that holds up on parts that actually get used, not just looked at.
If a part seems like it needs extra prep, it probably does. Do the job right on the front end, and the coating has a real chance to stay put for the long haul.


Comments